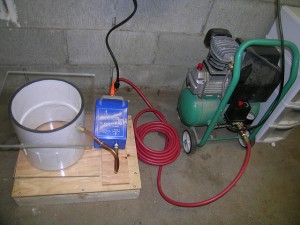
This article outlines how to build your own vacuum chamber. To learn more about what vacuum chambers are and their various uses, click here.
Vacuum chambers have many different uses in many varied fields. They can be used for degassing (removing bubbles of gas that form when two components are mixed, to keep the mixture pure). They can be used for vacuum drying (pulling off any moisture that may collect during the production process). They can also be used in the process of freeze drying food (removing all moisture from food for easy storage and transport).
While vacuum chambers have many different applications, they can also be very expensive. Luckily, with a little creativity it’s fairly easy to build your own vacuum chamber.
STEP 1: FIND A CHAMBER
First, you’ll need a chamber. Make sure it’s large enough to fit whatever you’re looking to put in your chamber, with a little spare room (the vacuum process can cause some substances to expand). Your chamber must be rigid enough to resist the pressure created by the vacuum environment. It must also be able to resist corrosion and the absorption of moisture and trace gases. Avoiding magnetic interference may be necessary as well, depending on what you’re planning to use your vacuum chamber for.
Aluminum and stainless steel are often used for vacuum chambers, as they meet all of the above criteria. Other effective materials are brass, high-density ceramic, and glass acrylic. Stronger, rigid plastics can be used as well.
The most natural shape for your chamber is a cylinder, as it is the easiest shape for a vacuum pump to work on.
STEP 2: YOUR TOP AND BOTTOM
If your chamber is a tube open on both ends, you’ll need to create a top and bottom. The material must meet the same criteria as outlined above. They also must be able to seal completely, with no gaps for air to escape. Consider attaching a rubber mat to the top and bottom to cushion against the chamber. It will form an air tight seal when the vacuum pump starts sucking, and will allow for a less-than-perfect cut of your chamber ends. It also allows for an easily removable top.
STEP 3: SET UP YOUR VACUUM PUMP
You’ll need a vacuum pump, of certain strength depending on your needs (if it’s freeze drying, you’ll need it to be capable of a pump level below 133 x 10-3). Drill a hole somewhere in the chamber or top, just large enough for the vacuum pump
to fit through. Seal with rubber o-rings, making sure there is no air leakage.
Give your vacuum pump a few test runs, and as long as there is no air leaking it should be functioning properly.
Good luck and stay prepared!
Source:preparedforthat.com

Leave a Reply